I will be broke by the end of next week. I love so much of the stuff here:
http://www.spoonflower.com/welcome
Right. Off to design my own perfect fabric!
Showing posts with label Sewing. Show all posts
Showing posts with label Sewing. Show all posts
Friday, 18 February 2011


Monday, 31 January 2011
Makeover Monday - Sweaters (and a Contest!)
Difficulty - Easy
I have a secret.
Ready?
I'm not very good at laundry.
I'm pretty good at remembering to do it on a (sort of) weekly basis, but double-plus-un-good at remembering to do things like check for money/train passes/lipstick in the pockets or ensure that there are no random red socks mixed in with the white towels. I also suck at remembering that I have a wool setting on the machine. This is why I have pink towels and a pile of sweaters that used to fit me, but are now more suited to my 18 month old niece.
You may have noticed that I don't like to throw things away. Like my formerly trashed shoes, these jumpers have moved with me more than once. But when sorting through things to go to the charity shop last week I started to feel bad about not doing anything with them - I can't wear them, no one else can wear them and they are taking up a lot of space in the wardrobe. So this week my makeover project is to turn those tiny woollen reminders of my ineptitude into something useful: cushion covers.
For this project, you will need:
1 sweater (this can be acrylic or wool)
Fabric to create the reverse side of the cushion
Fabric to back the sweater
Heavy duty needle for your machine - denim or leather rated
A cushion
Pins
Scissors
Iron
When finished, you will have two matching covers.
Step One: Work out how big your cover needs to be and make sure that your jumper is big enough.
I bought my cushion at Wilkinson - they're cheap there and a pretty standard size. To make sure that the jumper was going to be big enough, I shoved the cushion inside it.
Step Two: Cutting the sweater
Cut the arms and shoulders off roughly in line with the cushion. (You can cut through both sides of the sweater at the same time.) Cut below any edging at the neck - even if your cushion pokes above the V-neck like mine does. You don't have to measure to get this perfect. Remember - knits stretch. So long as it is really close, you'll be fine.

Step Three: Backing the wool.*
Right, as mentioned above, knits are stretchy. Over time they lose their shape. To keep your covers looking nice for as long as possible, you need to create a lining to go between the square of knit and the cushion. You can use almost anything as long as it is washable and doesn't stretch. I've got some leftover fabric from when I re-covered a sofa for a friend, so I'm going to use that.

Measure your cushion. Mine is 18 inches x 18 inches. Cut out two squares this size from your backing fabric.* (You'll need one for each cushion.)
Set these aside with the squares from the sweater.
Step Four: Cutting the outer fabric.
Only one side of the cushion is going to be woolly. The other side can be anything you want, as long as the fabric doesn't have any stretch. I'm using some upholstery samples that I've had forever.
Fold over a small section - about 1-1.5 inches, wrong sides together on the 18 inch sides of each piece. Press. Sew.

Set these aside.
Step Five: Putting it all together.
**The first few instructions are for the backing fabric. If you skipped step three, scroll down past the pictures with the blue acanthus backgrounds.**
Lay out your backing fabric square with one of the knit squares on top of it.
Make sure that the square from the sweater is really square (a slight curve in the bottom edge is normal - just make sure that the top and sides are square) and pin it into the middle of the backing fabric.


Your end result will look a bit odd and lumpy, but if you stretch the backing fabric out flat, it should look fine.
Sew the sweater onto the backing fabric. You don't want the stitches for this to show on the finished cover, so cut your normal seam allowance in half. In the picture below, I would normally have the edge of the fabric running along the line furthest from the needle. If you are worried about sewing in a perfectly straight line, load your sewing machine up with matching thread and shorten your stitch length. If your seams do end up really close together in places and peek through, it won't matter.

Once the sweater is sewn to the backing fabric, take all of the pins out. With the right sides together, lay the big piece of outer fabric over the sweater square.* Lay the shorter piece over top of this so that the finished edges are overlapping.
Pin the sides the same way you did when pinning the sweater onto the backing fabric, stretching it out to make sure there are no folds. Be sure that the bigger piece of outer fabric is on the 'inside' of the overlapped pieces.

Step Six: Finishing
Before you turn your cover the right way out, cut the corners off, making sure that you do not cut through any of your stitches.

If you don't do this, the corners of your cover won't look nice when you turn the cover the right way out. The corners will be bunched up and lumpy because there will be too much fabric in them.
Turn the cover the right way out and put the cushion into the cover.
Done.
Now for the Contest!
I wanted to thank everyone for their interest in my makeover projects. A lot of you have said that you wished that you sewed so that you could do some of them and others have made suggestions for projects that they would like to see. Some really good ideas. So I'm throwing it open - what would you like to see in Makeover Monday? Comments will be open for suggestions from 9 am Monday January 31st until Monday Feb 7th. I'll then pick one of the suggestions for the Feb 14th Makeover Monday.
But wait! There's more!
In addition, Random.org will pick one comment to win a pair of small cushion covers (for 18 X 18 cushions) made from this fabric, left over from my bedding makeover:

You can enter up to five times, but each entry needs to have a different suggestion for a Monday Makeover.
And yes, this is open to international entries.
* You can make the cushion without doing this step, but using a backing fabric makes the whole thing neater and will help to keep the cover from stretching out over time.
*I am not adding seam allowances to any of the measurements for this project. When you make covers for cushions, you need to account for the fact that you will want to cushion to be kind of fat and squashy rather than thin and flat. To get that, you need to make the cover just slightly smaller than the cushion. By cutting everything to the size of the cushion rather than adding seam allowances, my finished cover will be slightly smaller than the cushion and will enhance the squashy-ness.
*Right sides are the sides you want to show when the project is finished. In this case you want to lay the right side of the outer fabric against the sweater with the backing fabric against the floor.
I have a secret.
Ready?
I'm not very good at laundry.
I'm pretty good at remembering to do it on a (sort of) weekly basis, but double-plus-un-good at remembering to do things like check for money/train passes/lipstick in the pockets or ensure that there are no random red socks mixed in with the white towels. I also suck at remembering that I have a wool setting on the machine. This is why I have pink towels and a pile of sweaters that used to fit me, but are now more suited to my 18 month old niece.
 |
| Weep |
For this project, you will need:
1 sweater (this can be acrylic or wool)
Fabric to create the reverse side of the cushion
Fabric to back the sweater
Heavy duty needle for your machine - denim or leather rated
A cushion
Pins
Scissors
Iron
When finished, you will have two matching covers.
Step One: Work out how big your cover needs to be and make sure that your jumper is big enough.
I bought my cushion at Wilkinson - they're cheap there and a pretty standard size. To make sure that the jumper was going to be big enough, I shoved the cushion inside it.
 |
| Wide enough? Check. |
 |
| Long enough? Check. |
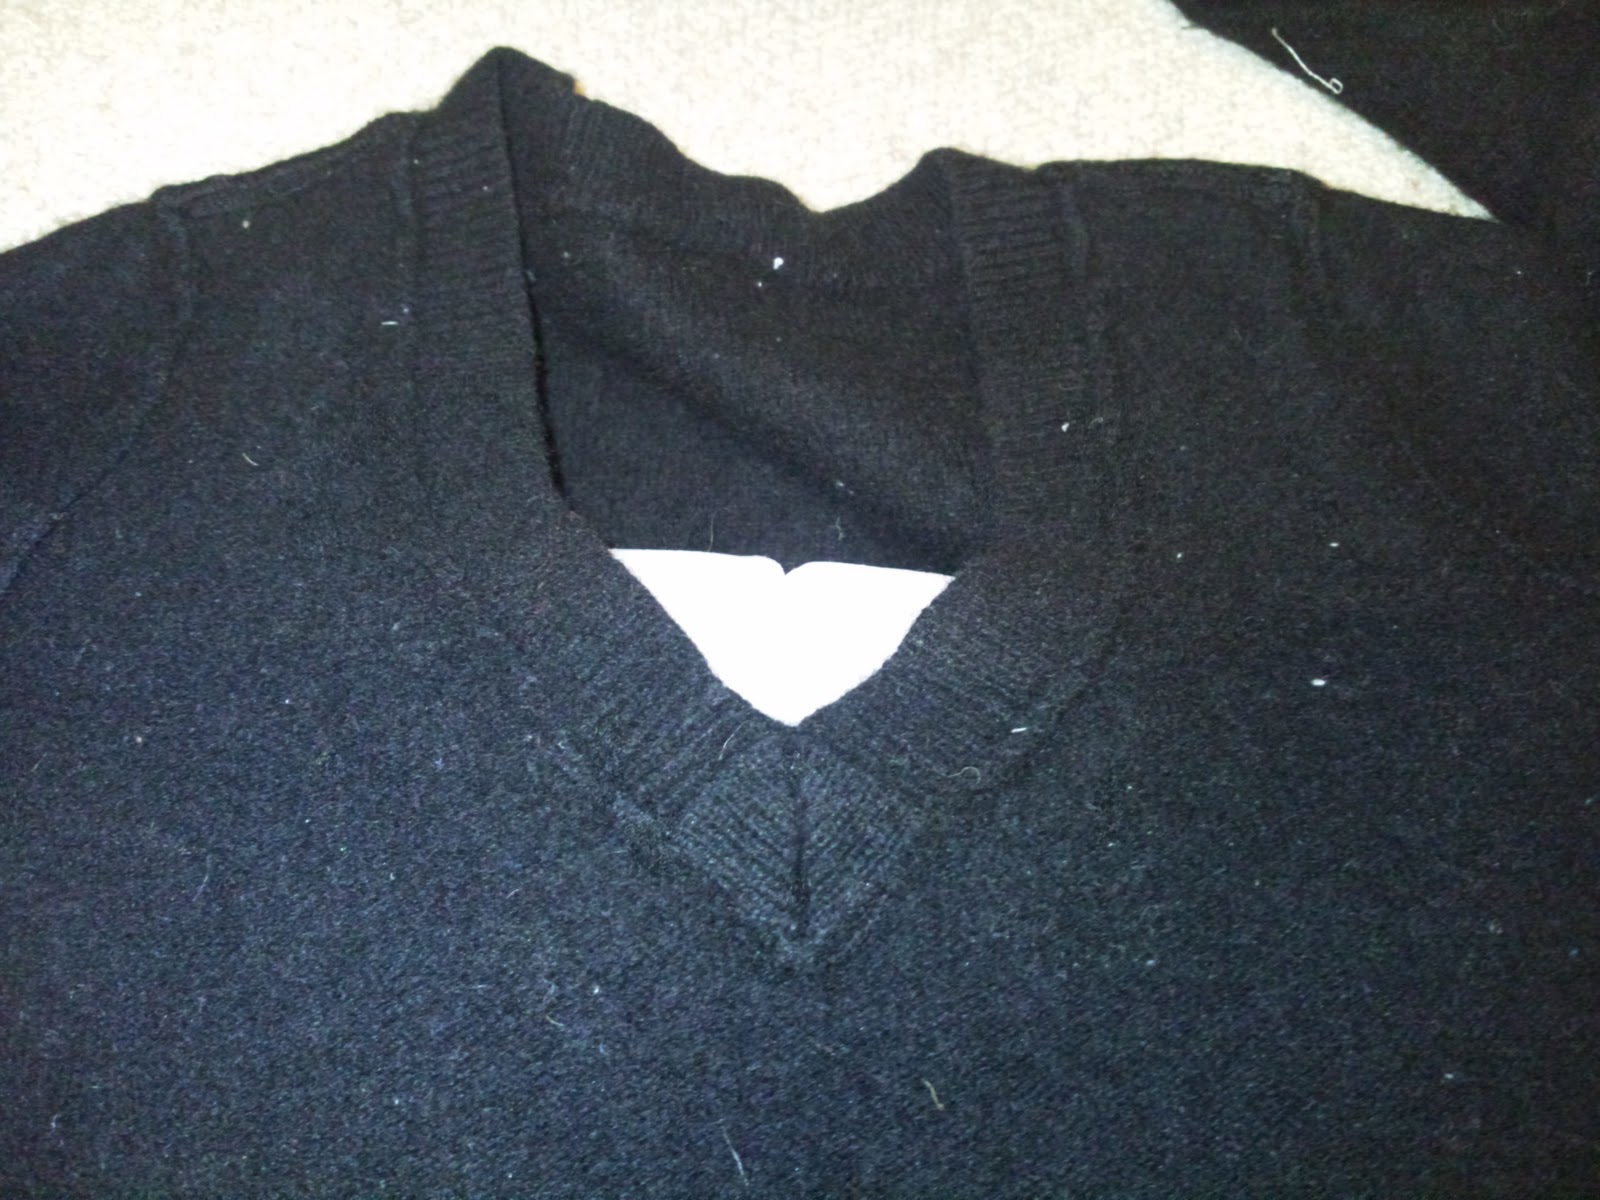 |
| It is okay if the sweater has a V-neck and some of the cushion isn't covered. |
Step Two: Cutting the sweater
Cut the arms and shoulders off roughly in line with the cushion. (You can cut through both sides of the sweater at the same time.) Cut below any edging at the neck - even if your cushion pokes above the V-neck like mine does. You don't have to measure to get this perfect. Remember - knits stretch. So long as it is really close, you'll be fine.

 |
| You can use the arms and shoulders of the jumper to make a draught excluder if you want. I'll do this as another project at some point. |
You should now have a knitted tube. Cut along the side seams to give yourself two squares. Set these aside for the minute.
 |
| It is best to cut so that you wind up with one seam on each piece. |
Step Three: Backing the wool.*
Right, as mentioned above, knits are stretchy. Over time they lose their shape. To keep your covers looking nice for as long as possible, you need to create a lining to go between the square of knit and the cushion. You can use almost anything as long as it is washable and doesn't stretch. I've got some leftover fabric from when I re-covered a sofa for a friend, so I'm going to use that.

Measure your cushion. Mine is 18 inches x 18 inches. Cut out two squares this size from your backing fabric.* (You'll need one for each cushion.)
Set these aside with the squares from the sweater.
Step Four: Cutting the outer fabric.
Only one side of the cushion is going to be woolly. The other side can be anything you want, as long as the fabric doesn't have any stretch. I'm using some upholstery samples that I've had forever.
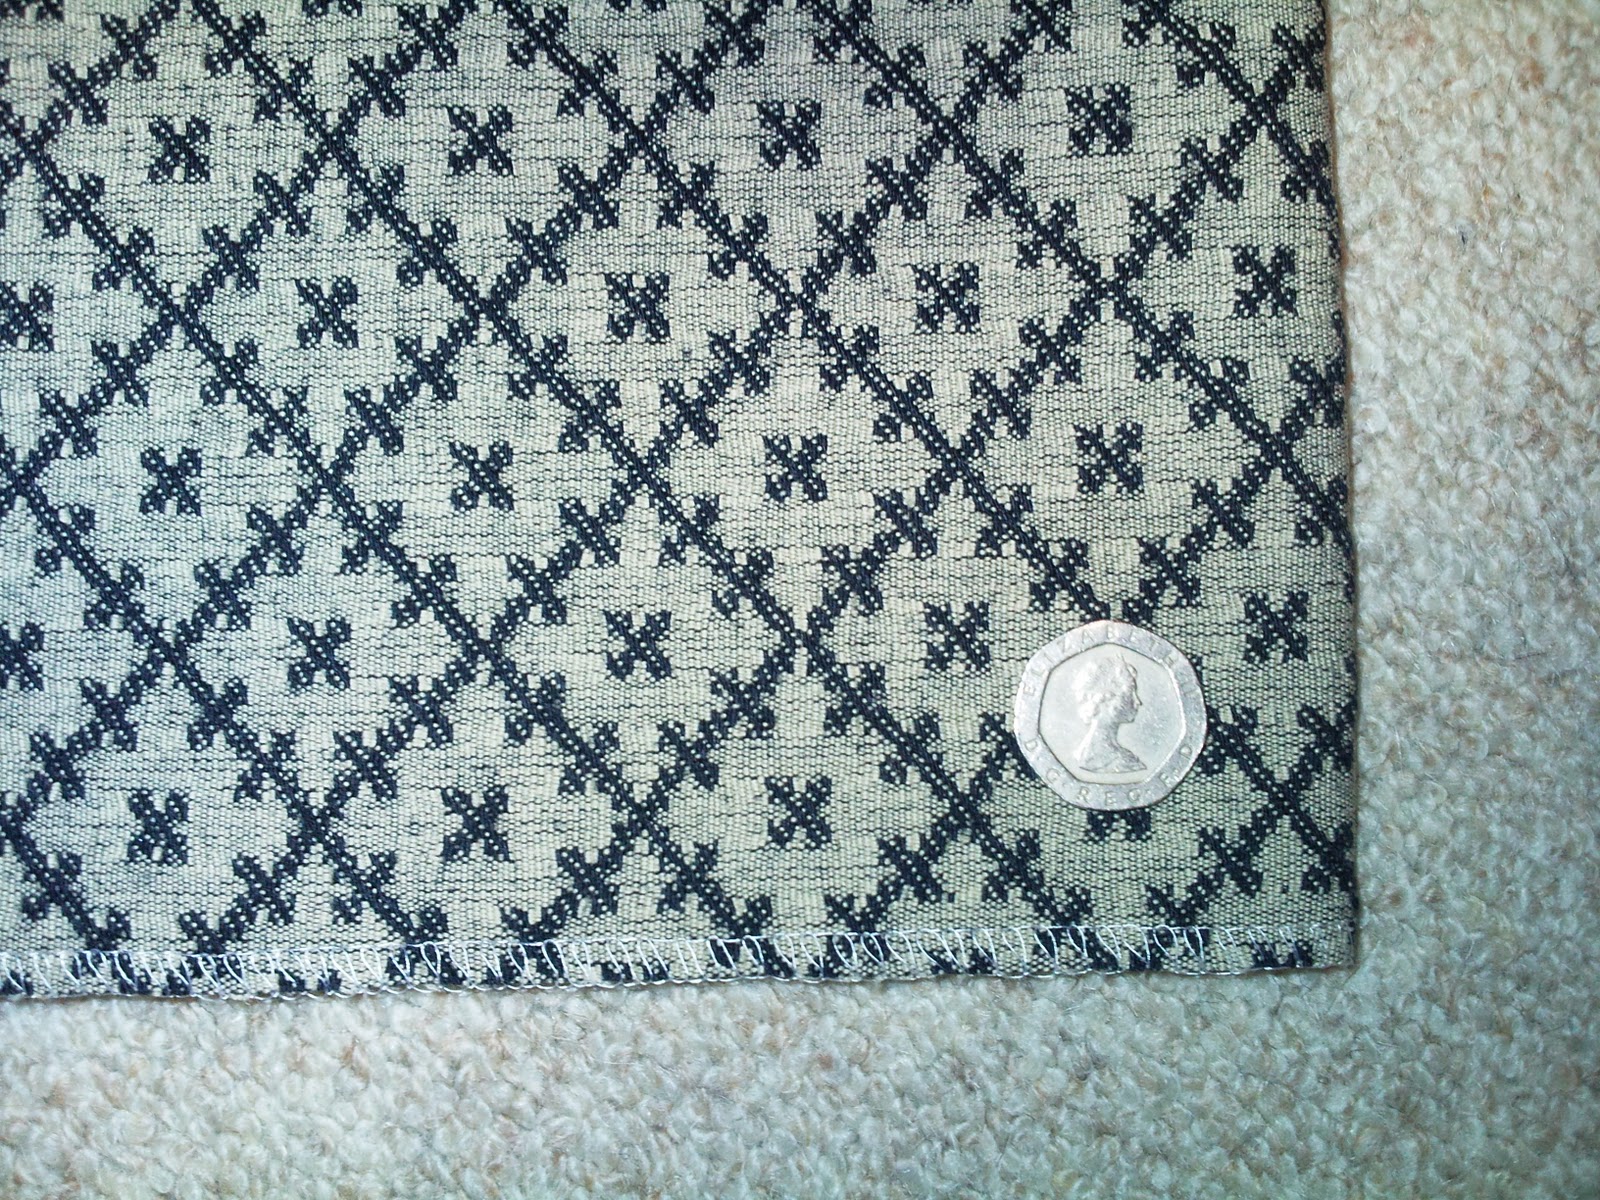 |
| Just to show the pattern size |
Cut two pieces of your outer fabric the same size as your cushion (18 x 18 in my case). Cut two more pieces as wide, but only about one third to one half as long. (I've cut mine 18 inches x 7 inches). One full size and one half size piece will make up the back of each cushion.
 |
| Showing the wrong sides |
Fold over a small section - about 1-1.5 inches, wrong sides together on the 18 inch sides of each piece. Press. Sew.

Set these aside.
Step Five: Putting it all together.
**The first few instructions are for the backing fabric. If you skipped step three, scroll down past the pictures with the blue acanthus backgrounds.**
Lay out your backing fabric square with one of the knit squares on top of it.
Make sure that the square from the sweater is really square (a slight curve in the bottom edge is normal - just make sure that the top and sides are square) and pin it into the middle of the backing fabric.

Starting at the corners, Stretch the sweater material out to cover the larger piece of backing fabric. Pin it in place.


It helps of you pin the four corners first, then stretch the sweater to fit the backing fabric, pin in the middle of each side, stretch it again pinning smaller and smaller sections down.


Your end result will look a bit odd and lumpy, but if you stretch the backing fabric out flat, it should look fine.
Sew the sweater onto the backing fabric. You don't want the stitches for this to show on the finished cover, so cut your normal seam allowance in half. In the picture below, I would normally have the edge of the fabric running along the line furthest from the needle. If you are worried about sewing in a perfectly straight line, load your sewing machine up with matching thread and shorten your stitch length. If your seams do end up really close together in places and peek through, it won't matter.

Once the sweater is sewn to the backing fabric, take all of the pins out. With the right sides together, lay the big piece of outer fabric over the sweater square.* Lay the shorter piece over top of this so that the finished edges are overlapping.
Pin the sides the same way you did when pinning the sweater onto the backing fabric, stretching it out to make sure there are no folds. Be sure that the bigger piece of outer fabric is on the 'inside' of the overlapped pieces.

This is where you will need the heavy duty needle in your machine. There is a lot of fabric to sew through and a standard needle may not be able to take it.
Sew all the way around with a normal seam allowance. Remove the pins.
Step Six: Finishing
Before you turn your cover the right way out, cut the corners off, making sure that you do not cut through any of your stitches.

If you don't do this, the corners of your cover won't look nice when you turn the cover the right way out. The corners will be bunched up and lumpy because there will be too much fabric in them.
Turn the cover the right way out and put the cushion into the cover.
 |
| Back |
 |
| Front |
Done.
Now for the Contest!
I wanted to thank everyone for their interest in my makeover projects. A lot of you have said that you wished that you sewed so that you could do some of them and others have made suggestions for projects that they would like to see. Some really good ideas. So I'm throwing it open - what would you like to see in Makeover Monday? Comments will be open for suggestions from 9 am Monday January 31st until Monday Feb 7th. I'll then pick one of the suggestions for the Feb 14th Makeover Monday.
But wait! There's more!
In addition, Random.org will pick one comment to win a pair of small cushion covers (for 18 X 18 cushions) made from this fabric, left over from my bedding makeover:

You can enter up to five times, but each entry needs to have a different suggestion for a Monday Makeover.
And yes, this is open to international entries.
* You can make the cushion without doing this step, but using a backing fabric makes the whole thing neater and will help to keep the cover from stretching out over time.
*I am not adding seam allowances to any of the measurements for this project. When you make covers for cushions, you need to account for the fact that you will want to cushion to be kind of fat and squashy rather than thin and flat. To get that, you need to make the cover just slightly smaller than the cushion. By cutting everything to the size of the cushion rather than adding seam allowances, my finished cover will be slightly smaller than the cushion and will enhance the squashy-ness.
*Right sides are the sides you want to show when the project is finished. In this case you want to lay the right side of the outer fabric against the sweater with the backing fabric against the floor.
Monday, 24 January 2011
Makeover Monday - Bedding
Difficulty: Easy
Husbando is fairly tall. I am fairly not. We used to bicker about the amount of space we had in the bed. Then we got a new bed. A big bed. A lovely, argument killing, blissful sleep machine.
Except then the duvet was too small.
So this week's makeover is going to take one of my King-size duvet covers and make it fit my super-wide duvet.
For this project you will need:
1 duvet cover
Similar weight fabric to expand the cover - the amount will depend on how much you are expanding.
A measuring tape
A sewing machine
Pins
An iron
First thing to do is work out exactly how much bigger the cover needs to be.
Step One: Measure your duvet.
Round UP to the nearest whole inch. Mine is 85 inches long (head to toe) by 100 inches wide (side to side). (Write this down).
Step Two: Measure the cover that doesn't fit and work out how much bigger it needs to be.
My plain white cover is 82 inches long by 89 inches wide. (Write this down too). You need to be sure that you are measuring like for like - figure out before you measure which side is width and which is length on both the cover and the duvet and be consistent in your notation. Otherwise you might wind up with the opening of the cover along the side of the bed rather than at your feet because you have added the fabric to the wrong area and that is how it now fits.
So, my duvet cover is 3 inches too short and 11 inches too narrow. This means that I need to add a piece 3 inches x 100 inches along the top and a strip 11 inches by 82 inches along the side. If I did just that - added the new fabric along only two sides, it would work. But it would look weird. So:
Step Three: Decide where you will add the expansion.
There are two easy options for where to put the extra fabric.* If you have space big enough, lay the duvet cover out on the floor. (I do not have a space big enough and so I can only bring you step by step images courtesy of Microsoft Paint this week.) Imagine that this is my white cotton duvet cover on the floor:
Now, the first option is to cut the duvet into four equal pieces (the duvet isn't a perfect square so the pieces won't be perfectly square either) and add the fabric in the middle:
Going with this option means that the new fabric will create a cross in the middle of your duvet. It could be a really interesting look - especially if you have some vintage fabric. You have to be really, REALLY careful when you measure and cut the duvet with this option though. If you don't get the cuts straight, it will throw everything off, will be really annoying to sew and the finished product will be wonky.
The other option is to open the side and top seams of the duvet and add the new fabric in a band around the edges, splitting the 11 inch wide piece into two 5.5 inch strips:

I'm going to go with the band around the edges for two reasons. Firstly, it's easier. I don't need to worry about cutting straight because all I'm doing is opening up side seams. Secondly, the duvet cover is white and I live in England. The duvet could end up looking like this:

While we support the England football team when they are playing, there is another red and white flag that takes precedence in our house, thank you very much.*
Step Four: How much extra fabric do you need?
I have some old Ikea curtains that are helping out on this project, but if you need to go out and buy fabric, you need to be sure that you get enough. You also need to be careful if you are using a fabric with a pattern. Take account of patterns when you are working out your yardage. I am using stripes so I have to make sure that I have enough fabric to ensure all of the stripes end up going the same way or my head will explode.
I'll use my measurements as an example of how to work this out.
The longest piece I need has to be 82 inches high x 5.5 inches wide. I need two of these, one for each side. I also need a piece that is 100 inches wide x 3 inches high.
BUT WAIT!
A duvet has two sides, that means I actually need bigger pieces than that.
Because I have chosen the around the edges option, this is not a problem. Simply double the smallest numbers in each measurement.
100 (w) x 3 (h) becomes 100 x 6 (both sides of the top),
5.5(w) x 82(h) becomes 11 x 82 (you still need two of these - one for the left and one for the right).
You also need to add some extra in for the seams. If you make half inch seams, you should add 1 inch to the measurements - all around this time.
101(w) x 7(h) for the top - cut one
12(w) x 83(h) for the side - cut two
Add your (w)'s and your (h)'s ONLY COUNT 1 PIECE OF 12 x 83 IN THIS. (I will explain why in a minute).
101 + 12 = 113(w)
83 + 7 = 90(h)
So you need a piece of fabric that is at least 90 inches high and 113 inches wide.
The reason you are only counting one piece of 83 x 12 is because when you cut it out you can do this:
Problem is - you aren't going to find a lot of fabric 100 inches wide. The maximum is usually about 60 inches with 45 being about about average. You need to tweak the layout.
My fabric happens to be 54 inches wide so I'm going to divide the top piece into two of 51 x 7. (I've rounded up to 51 because I need to include the new half inch seam allowance where the two pieces will join in the middle).
So my actual cutting layout looks a little like this:

If I was buying fabric for this project I would look for fabric at least 51 inches wide and buy 2.8 yards of fabric. (83 + 7 + 7 = 97 inches. 100 inches = 2.777 yards)
Step Five: Cut everything out
Once you have checked your measurements (make sure you wrote everything down at the start) you can cut out your pieces. Remember rule 1: Measure twice, cut once.
Let me say that again in case you missed it:
RULE # 1 : Measure twice, cut once.
I can't male the font any bigger. You'll just have to trust me on how important it is to get your measurements right.
Step Six: Preliminary sewing and ironing.
Stitch together the two 51 inch pieces to make one piece 101 inches wide. Fold it in half (right sides together) so you have a double thickness piece 3.5 inches high and 101 wide. Iron it. Sew half inch seams along the 3.5 inch sides. You should now have a piece 101 inches long, open on only one side (one of the 101 inch sides).
Fold the 12 x 83 inch pieces so you have two pieces that are 6 x 83. You want to fold right sides together again. Iron. Don't sew yet.
Step Seven: Open up the seams on the duvet cover
You can either spend time carefully cutting through the overlocked edge I'm sure you have on the inside of your duvet cover, or you can do what I did and just cut the existing stitching off right up against the stitches. This is much faster. If there is a partial seam along the bottom to either side of the closing snaps/poppers/whatever you call them, leave this as it is. It will help to keep clear where the top is and where the sides are.
Step Eight: Sew on the expansions
It's easiest to sew the sides on first. Turn the duvet inside out. Pin one side of each of the 12 x 82 inch pieces to the duvet. You will be making two long seams.

Now pin the other side of the duvet on to the free edges of the 12 x 83 pieces and make two more long seams. Once the new sides are sewn in, you can stitch along the bottom edge of the addition.You should now have a cover wide enough for your duvet.
Leave the cover inside out. Pin the folded 100 x 3.5 piece along the top, starting at the corner formed by the new side fabric. You should have pressed this so it will be easy to see where the seam on the 100 x 7 piece meets up with the crease on the expansion.
Handy Tip:
Turn your 100 x 3.5 piece the right way out. (The duvet cover should still be inside out.) Put the 100 x 3.5 piece inside the duvet cover so that the right side of the fabric is touching the right side of the duvet cover. The top corners of the 101 inch wide addition should be pointing down inside the duvet. Match the seam on the 100 x 3.5 piece with the creases you pressed into the 12 x 83 inch pieces.
You should now only be able to see the wrong sides of both the expansion piece and the duvet cover. (If you have ever short sheeted a bed, it helps to picture this when you are trying to get the layout right.)
Sew all the way around the top edge and turn the whole thing right side out to check that you got all the bits in the right places. You should now have something that looks like this:

Since my bed has a foot-board and the duvet is always tucked in, I'm not worried about the fact that the bottom edge is odd.
That's it for the cover. Wrestle your duvet in and all your measurements being well, you should have something that fits.
Step Nine: What to do with the Spare fabric?
I don't like waste fabric and I love things that match almost as much as I like cleaning. So I decided to use the spare fabric to make two pillow cases. These are easy.
9a)Measure the long side of a pillow case. Double it. Add 10 inches.
9b)Measure the short side.
Long side: 28 inches (doubled +10 = 66)
Short side: 20 inches
From my spare fabric I cut two pieces of fabric 67 inches long and 21 inches wide (including seam allowance).
Fold over the 10 inch addition so that the wrong sides of your fabric are together. Iron it. (This is the bit you fold over the pillow when it is in the case). Now fold the fabric in half so you have something 28 x 20, right sides together. Sew along the 28 inch sides. Turn right sides out. Fill with pillow. Repeat with as many pillows as you have in whatever measurements they are, always remembering to add at least 10 inches for the inner fold.
Now go and make your bed.


Next week: What to do with those wool jumpers you accidentally washed at 65.
Husbando is fairly tall. I am fairly not. We used to bicker about the amount of space we had in the bed. Then we got a new bed. A big bed. A lovely, argument killing, blissful sleep machine.
Except then the duvet was too small.
When we bought the new, super-wide duvet we thought that one of our existing covers (too big for the old duvet) would fit. It didn't. I managed to find one cover at J-Lew*, but there was only the one and subsequent searches for a cover big enough have not been successful.*
So this week's makeover is going to take one of my King-size duvet covers and make it fit my super-wide duvet.
1 duvet cover
Similar weight fabric to expand the cover - the amount will depend on how much you are expanding.
A measuring tape
A sewing machine
Pins
An iron
First thing to do is work out exactly how much bigger the cover needs to be.
Step One: Measure your duvet.
Round UP to the nearest whole inch. Mine is 85 inches long (head to toe) by 100 inches wide (side to side). (Write this down).
Step Two: Measure the cover that doesn't fit and work out how much bigger it needs to be.
My plain white cover is 82 inches long by 89 inches wide. (Write this down too). You need to be sure that you are measuring like for like - figure out before you measure which side is width and which is length on both the cover and the duvet and be consistent in your notation. Otherwise you might wind up with the opening of the cover along the side of the bed rather than at your feet because you have added the fabric to the wrong area and that is how it now fits.
So, my duvet cover is 3 inches too short and 11 inches too narrow. This means that I need to add a piece 3 inches x 100 inches along the top and a strip 11 inches by 82 inches along the side. If I did just that - added the new fabric along only two sides, it would work. But it would look weird. So:
Step Three: Decide where you will add the expansion.
There are two easy options for where to put the extra fabric.* If you have space big enough, lay the duvet cover out on the floor. (I do not have a space big enough and so I can only bring you step by step images courtesy of Microsoft Paint this week.) Imagine that this is my white cotton duvet cover on the floor:
 |
| Isn't it lovely. |
 |
| Showing where you would cut for option one. |
Going with this option means that the new fabric will create a cross in the middle of your duvet. It could be a really interesting look - especially if you have some vintage fabric. You have to be really, REALLY careful when you measure and cut the duvet with this option though. If you don't get the cuts straight, it will throw everything off, will be really annoying to sew and the finished product will be wonky.
The other option is to open the side and top seams of the duvet and add the new fabric in a band around the edges, splitting the 11 inch wide piece into two 5.5 inch strips:

I'm going to go with the band around the edges for two reasons. Firstly, it's easier. I don't need to worry about cutting straight because all I'm doing is opening up side seams. Secondly, the duvet cover is white and I live in England. The duvet could end up looking like this:

Step Four: How much extra fabric do you need?
I have some old Ikea curtains that are helping out on this project, but if you need to go out and buy fabric, you need to be sure that you get enough. You also need to be careful if you are using a fabric with a pattern. Take account of patterns when you are working out your yardage. I am using stripes so I have to make sure that I have enough fabric to ensure all of the stripes end up going the same way or my head will explode.
I'll use my measurements as an example of how to work this out.
The longest piece I need has to be 82 inches high x 5.5 inches wide. I need two of these, one for each side. I also need a piece that is 100 inches wide x 3 inches high.
BUT WAIT!
A duvet has two sides, that means I actually need bigger pieces than that.
Because I have chosen the around the edges option, this is not a problem. Simply double the smallest numbers in each measurement.
100 (w) x 3 (h) becomes 100 x 6 (both sides of the top),
5.5(w) x 82(h) becomes 11 x 82 (you still need two of these - one for the left and one for the right).
You also need to add some extra in for the seams. If you make half inch seams, you should add 1 inch to the measurements - all around this time.
101(w) x 7(h) for the top - cut one
12(w) x 83(h) for the side - cut two
Add your (w)'s and your (h)'s ONLY COUNT 1 PIECE OF 12 x 83 IN THIS. (I will explain why in a minute).
101 + 12 = 113(w)
83 + 7 = 90(h)
So you need a piece of fabric that is at least 90 inches high and 113 inches wide.
The reason you are only counting one piece of 83 x 12 is because when you cut it out you can do this:
 |
| All of my stripes will be going in the same direction with this layout. |
My fabric happens to be 54 inches wide so I'm going to divide the top piece into two of 51 x 7. (I've rounded up to 51 because I need to include the new half inch seam allowance where the two pieces will join in the middle).
So my actual cutting layout looks a little like this:

If I was buying fabric for this project I would look for fabric at least 51 inches wide and buy 2.8 yards of fabric. (83 + 7 + 7 = 97 inches. 100 inches = 2.777 yards)
Step Five: Cut everything out
Once you have checked your measurements (make sure you wrote everything down at the start) you can cut out your pieces. Remember rule 1: Measure twice, cut once.
Let me say that again in case you missed it:
RULE # 1 : Measure twice, cut once.
I can't male the font any bigger. You'll just have to trust me on how important it is to get your measurements right.
Step Six: Preliminary sewing and ironing.
Stitch together the two 51 inch pieces to make one piece 101 inches wide. Fold it in half (right sides together) so you have a double thickness piece 3.5 inches high and 101 wide. Iron it. Sew half inch seams along the 3.5 inch sides. You should now have a piece 101 inches long, open on only one side (one of the 101 inch sides).
Fold the 12 x 83 inch pieces so you have two pieces that are 6 x 83. You want to fold right sides together again. Iron. Don't sew yet.
Step Seven: Open up the seams on the duvet cover
You can either spend time carefully cutting through the overlocked edge I'm sure you have on the inside of your duvet cover, or you can do what I did and just cut the existing stitching off right up against the stitches. This is much faster. If there is a partial seam along the bottom to either side of the closing snaps/poppers/whatever you call them, leave this as it is. It will help to keep clear where the top is and where the sides are.
Step Eight: Sew on the expansions
It's easiest to sew the sides on first. Turn the duvet inside out. Pin one side of each of the 12 x 82 inch pieces to the duvet. You will be making two long seams.

Now pin the other side of the duvet on to the free edges of the 12 x 83 pieces and make two more long seams. Once the new sides are sewn in, you can stitch along the bottom edge of the addition.You should now have a cover wide enough for your duvet.
Leave the cover inside out. Pin the folded 100 x 3.5 piece along the top, starting at the corner formed by the new side fabric. You should have pressed this so it will be easy to see where the seam on the 100 x 7 piece meets up with the crease on the expansion.
Handy Tip:
Turn your 100 x 3.5 piece the right way out. (The duvet cover should still be inside out.) Put the 100 x 3.5 piece inside the duvet cover so that the right side of the fabric is touching the right side of the duvet cover. The top corners of the 101 inch wide addition should be pointing down inside the duvet. Match the seam on the 100 x 3.5 piece with the creases you pressed into the 12 x 83 inch pieces.
You should now only be able to see the wrong sides of both the expansion piece and the duvet cover. (If you have ever short sheeted a bed, it helps to picture this when you are trying to get the layout right.)
Sew all the way around the top edge and turn the whole thing right side out to check that you got all the bits in the right places. You should now have something that looks like this:
Since my bed has a foot-board and the duvet is always tucked in, I'm not worried about the fact that the bottom edge is odd.
That's it for the cover. Wrestle your duvet in and all your measurements being well, you should have something that fits.
Step Nine: What to do with the Spare fabric?
I don't like waste fabric and I love things that match almost as much as I like cleaning. So I decided to use the spare fabric to make two pillow cases. These are easy.
9a)Measure the long side of a pillow case. Double it. Add 10 inches.
9b)Measure the short side.
Long side: 28 inches (doubled +10 = 66)
Short side: 20 inches
From my spare fabric I cut two pieces of fabric 67 inches long and 21 inches wide (including seam allowance).
 |
| p |
Now go and make your bed.


Next week: What to do with those wool jumpers you accidentally washed at 65.
*John Lewis
*Actually, I can find covers. Finding them isn't the problem. The problem is that I'm cheap and I'm not going to spend £80.00 on a duvet cover. Not when I have a cupboard full of covers that ALMOST fit, a sewing machine and a room full of fabric.
*And loads of difficult ones, but I'm not into difficult this week so you're getting the easy ones.
*See above re: easy. A maple leaf applique is not easy.
Subscribe to:
Posts (Atom)